Introduction
You’ve eaten tamagoyaki at restaurants. It’s a popular sushi topping. It is a side dish staple in bento boxes, izakaya menus, and breakfast spreads. It appears in sandwiches and onigiraizu. You might even have attempted recreating it at home. But this silky Japanese rolled omelette can prove surprisingly tricky for the home cook.
There’s no substitute for practice when it comes to perfecting tamagoyaki — even the pros have to make hundreds of them before they can get them picture-perfect each time. However, there are a number of approaches and tips one can implement to help you get there faster.
What is tamagoyaki?
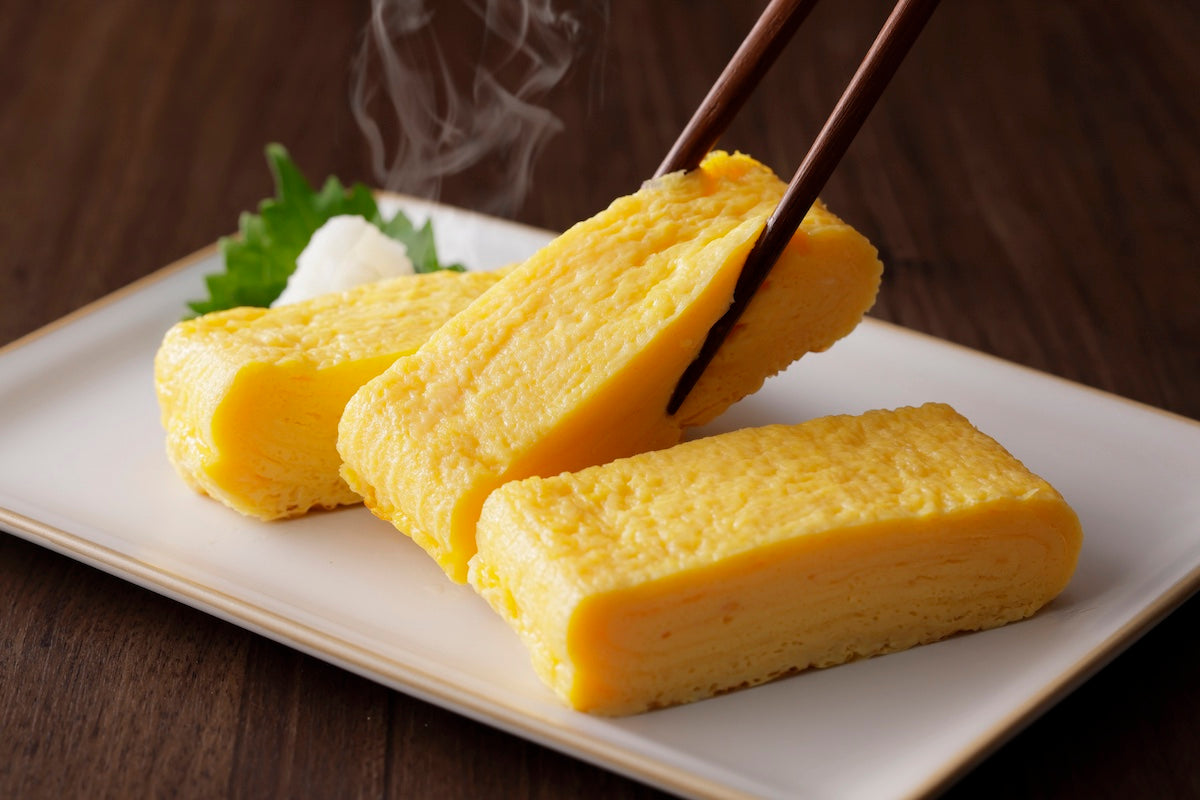
Tamagoyaki is a Japanese style of omelette with a tender, custardy texture. Its distinctive shape comes from rolling multiple thin layers of omelette into a log, and then slicing it.
The exact combination of seasonings varies by cook and region, but dashi, soy sauce, mirin, and sugar are often added to the beaten egg mixture before cooking. Some cooks such as Nancy Hachisu believe that starting with high-quality eggs means that seasonings can be kept to a minimum to highlight the flavour of the eggs themselves — a touch of soy sauce and sugar is all that’s needed.
A key factor in making tamagoyaki is that the cooking and rolling all take place in the pan. Prepared egg mixture is poured into a heated and greased rectangular pan — just enough to make a thin omelette — cooked until soft and barely set, then rolled and pushed to one side of the pan.
Then, the empty part of the pan is lightly re-oiled. Using chopsticks, lift the edge of the roll while pouring more egg mixture into the greased pan. The egg should flow under the roll and help the new layer bind smoothly onto the existing roll. When this new omelette layer is just set, the first roll is, well, rolled across the pan until the new layer is fully incorporated into the first roll, creating multiple concentric layers of egg. This process is repeated until you run out of egg mixture.

The eggvolution of tamagoyaki
Tamagoyaki is a fairly recent addition to Japanese cuisine. (So, not a long tamago.) Eggs were not widely consumed until the Edo period (1603-1868) when the ban on meat and egg consumption was lifted. A 1785 recipe book called 万宝料理秘密箱 (Lit. A Treasure Box of Many Cooking Secrets) contains recipes for seaweed rolls with egg and sweet atsuyaki-tamago, suggesting that early versions existed during the mid-Edo period. Even then, eggs were considered a real treat, and a luxury ingredient out of the reach of most commoners.
Tamagoyaki as we know it today only became widespread in the 20th century as eggs became cheaper and more widely available, and indeed, only made its first appearance sometime during the latter half of the 19th century.
This style of rolled omelette is characterised by its moist, tender texture, which requires the addition of sugar and mirin — ingredients that were historically too expensive for regular people until well into the 20th century. For this reason, tamagoyaki recipes weren’t among the egg recipes found in Edo period cookbooks.
The way tamagoyaki is cooked means that the egg layers remain in a hot pan for longer than the average omelette; in other words, there’s more time (and thus exposure to heat) for the proteins to denature and clump together, making the omelette unpleasantly rubbery. Sugar and mirin help raise the temperature at which denaturation takes place, thus slowing down the coagulation of the egg mixture, and giving the cook more time to cook each omelette layer.
According to the Ministry of Agriculture, Forestry, and Fisheries, ‘tamago fuwa-fuwa’ — literally ‘fluffy eggs’ — may have an early ‘prototype’ of tamagoyaki. This was a dish that involved pouring beaten eggs into boiling stock and then steaming them, and was supposedly considered a delicacy among Edo commoners.

Regional styles of tamagoyaki
Broadly speaking, tamagoyaki falls into two camps — east and west. These are the principal differences between them.
Kantō-style tamagoyaki
- The style of tamagoyaki most associated with eastern Japan. Sometimes called ‘atsuyaki tamago.’
- Has a noticeably sweet taste on account of using more sugar and/or mirin, in addition to shoyu and dashi
- Typically has a higher ratio of egg to added liquid, resulting in a firmer, bouncier texture
- Colour-wise tends towards a rich yellow, even lightly toasted and browned on the surface
- Sturdy enough to pack into bento boxes without disintegrating or collapsing

Kansai-style dashimaki
- The style of tamagoyaki most associated with western Japan
- As the name suggests, contains a higher ratio of dashi stock to egg, with minimal use of sugar
- Lightly seasoned with salt and soy sauce (if at all)
- Is consequently more savoury than sweet
- Texture-wise, tends to be very soft, tender, and wobbly, and can be rather juicy from the high amount of liquid
- Colour-wise tends to be pale yellow, with minimal browning
- Typically served directly after cooking as it can be quite delicate — too fragile for the lunch box
Bonus: Datemaki
- A festive New Year variant on tamagoyaki where surimi (fish paste) is mixed into the egg
- It is baked and rolled, resulting in a denser spiral
It’s all about the ratio of added liquid to egg
There are thousands of tamagoyaki recipes out there, but as you may have gathered from the differences between Kantō and Kansai-style rolled omelette, it is the ratio of added liquid — whether dashi, soy sauce, and/or mirin — to egg that determines the final texture.
Generally speaking, the more liquid added to the egg, the more technically demanding the recipe — which also means that the final dish will be far more tender and delicate. The less liquid, the firmer the final result.
In home-style tamagoyaki recipes, you might see ratios of 1 tablespoon of dashi per egg, which results in a soft, moist omelette that’s still relatively easy for the home cook.
Restaurant-style dashimaki recipes tend to feature high ratios of dashi to egg, sometimes as much as 1:1. It’s all too easy for inexperienced cooks to tear the omelette while rolling each layer. Home cooks can mitigate this by adding a little potato or corn starch, which binds with the egg proteins to keep them from separating during the cooking process.

Tips and techniques
There’s no substitute for practice. However, there are a number of details that can make the difference between okay and excellent tamagoyaki. Implementing even one or two of the following techniques is likely to help improve your tamagoyaki game.
Before cooking
- Start with fresh, high-quality, room-temperature eggs. The omelette is only as good as the eggs you begin with.
- When preparing your egg mixture, ‘cut’ the egg mixture using chopsticks, tracing a zig-zag motion against the bottom of the bowl, rather than vigorously beating them. The idea is to evenly blend the eggs without introducing additional air into the mixture, so that the final omelette doesn’t have huge air holes in each layer.
- Pour the beaten egg through a sieve to remove the chalazae and any remaining lumps for a smoother omelette. Take this time to remove any air bubbles as well.
- Add any salt early. While salt does encourage egg proteins to bond at lower temperatures when exposed to heat, it also acts as a buffer, preventing them from tightly linking during the cooking process, thus helping the egg remain moist and tender.

During the cooking process
- Use a rectangular tamagoyaki pan for the classic log shape. For more details, see our guide on choosing one.
- Heat the pan evenly and thoroughly, and keep this heat consistent by sliding the pan on and off the burner rather than adjusting the flame. The egg should set quickly but not brown too fast.
- A cold or unevenly heated pan results in egg sticking to the pan in places. Not fun.
- The pan is hot enough when a drop of egg sizzles lightly on contact.
- The pan should be entirely covered with a very thin film of oil — no empty patches allowed!
- Don’t pour too much egg mixture in — each layer should be thin enough to set quickly. Aim for a higher number of thin layers, rather than a small number of thick layers.
- Pop any air bubbles with your chopsticks, and let a little raw egg flow into the hole to smooth it out. This helps prevent uneven layers and tearing when you roll.
- Each layer should still be shiny, even slightly runny (but just set on the bottom and edges) when you begin rolling it up. It will continue cooking inside the roll.
- Use your chopsticks to guide and lift the egg when rolling each layer, rather than using them to push or drag.
- Roll the egg by snapping the pan towards you with small movements, rather than relying on the chopsticks. Some Japanese recipes describe this as tilting and swinging the pan in an arc. Let gravity do most of the work.
- Don’t over-tilt the pan — small, smooth motions make a cleaner roll.
- As soon as you pour in a new portion of egg mixture for the next layer, tilt the pan so that the egg spreads to all the corners, rather than pushing the egg around with your chopsticks.
- Re-oil the pan between every new egg layer to keep them from sticking. This is especially important for copper or carbon steel pans.
Afterwards
- Roll the egg and gently press it into shape using a makisu (bamboo mat) while it’s still warm.
- Let it rest for a few minutes to allow the egg to firm up. This will result in cleaner slices. Cutting it too soon tends to result in crumbly, messy slices — especially with high-dashi tamagoyaki.
By Florentyna Leow